CONGRATS!!!! I will DM you on Twitter for your info:)
Saturday, August 28, 2010
Friday, August 27, 2010
Five Freaky, Family, Funny, or Fabulous Photo Friday...
Freaky, Family, Funny, or Fabulous, these photos will sure be one or all of that.
Every Friday I am going to share five random pictures that I have taken in the past years. Some with my Nikon SLR, my iPhone, or my Kodak. All different quality cameras but the subject is what means the most to me.
Kid Randomness...


Wednesday, August 25, 2010
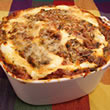
Taco Night not in the House, on the Grill...

I love Tacos and Taco Night. It is actually a meal we all enjoy even the kids. But I HATE cooking the chop meat in the house. I find it is so messy and I just didn't feel like dealing with it this night. I decided to try and do it on the outside grill. My husband told me I was nuts!! He said it would never work and I shouldn't even bother but I was determined to make it work:)
I used the Ortega Grande Dinner Kit Hard & Soft Tacos and 2 lbs of chop meat.
We (I say we because I don't know how to turn it on but I did watch;)) turned on the grill to high. Then when I was ready to cook, I turned it down to medium. (I'm not going to lie, I was afraid the pan was going to blow up or something if I kept it on high)
I used my Green Pan Frying Pan which I knew could take the heat since these pans are made to go in the oven at a higher heat then my grill.
I fried up the meat which took a little longer then usual but no mess and I got to sit outside and enjoy the weather while it was cooking! I just kept stirring it. It took about 15 mins.
After that was done I set it aside and put down the Reynold's Grilling Foil to heat the hard taco shells. I closed the lid and that took no time at all. I actually burned some they heated up super quick! Just sit there and watch them, don't walk away and tend to the garden like I did!! lol
The only thing that couldn't be done outside were the soft shells. That is done in the microwave.
They tasted great and no mess in the house!! Only 1 pan to clean since I used disposable for everything else.
So Tacos can be done on the Grill and I liked it better then inside on the stove:) Try it, you might like it!!


Tuesday, August 24, 2010
FREE 1 Year Subscription Taste Of Home and Everyday with Rachael Ray - Hurry!
 Waking up early has it's perks today... Hurry to request your free 1 year subscription to Taste of Home - America’s #1 Cooking Magazine! In every issue, you’ll enjoy 100+ home-style recipes & tips and mouth-watering meals your family’s sure to love.


You can also request a FREE 1 year subscription to Everyday with Rachael Ray -30-Minute Meals and tons of quick, easy recipes, 100′s of cool tips about food and entertaining and Rach’s top picks for gadgets and kitchen tools! ..I was able to request both, but these will go VERY FAST!!
Thanks, Bucktown Bargains
Free Skin Cancer Screening at Wantagh Park, NY...

Senator Charles J. Fuschillo, Jr. is sponsoring this Thursday free skin cancer screening program from 11 am to 2:30 pm at Wantagh Park. As the summer comes to an end, it is now a great time to obtain a free skin cancer screening. Hope to see you at Wantagh Park. If you have any questions, please call his office at 516-882-0630.
Getting checked is very important. My Mom was diagnosed with Skin Cancer this year on her nose. My Dad kept telling her to get it checked out and she finally did. She had to get Mohs Surgery and Thank God it did not go as deep as they had thought! She no longer has it but she is now very careful about going in the sun umprotected! A tan is not as important as your health. Please get checked regualry and protect yourself in the sun!!
Getting checked is very important. My Mom was diagnosed with Skin Cancer this year on her nose. My Dad kept telling her to get it checked out and she finally did. She had to get Mohs Surgery and Thank God it did not go as deep as they had thought! She no longer has it but she is now very careful about going in the sun umprotected! A tan is not as important as your health. Please get checked regualry and protect yourself in the sun!!
Q: What does the SPF number on sunscreens mean?
A: The sunburn protection factor, or SPF, measures protection against only ultraviolet radiation B, UVB, which causes burning, says Henry Lim, chairman of dermatology at Henry Ford Hospital in Detroit. The SPF level doesn't measure protection against ultraviolet radiation A, UVA, which causes aging of the skin, says Otis Brawley, chief medical officer of the American Cancer Society. Both types of UV rays cause cancer, he says. Experts say consumers should look for sunscreens that protect against both UVA and UVB rays.
Q: How protective are sunscreens?
A: Sunscreens can give people a false sense of security, Brawley says. He says people shouldn't use sunscreen to stay in the sun extra long. While sunscreen is important, covering up with a hat and long sleeves offers more protection, he says."You can actually use sunscreen to avoid sunburn, so you can get more UV radiation and increase your risk of melanoma," Brawley says.
Q: Do sunscreens offer everyone the same protection?
A: No. Brawley notes that SPF ratings are averages. For someone who's prone to burning, a sunscreen that's labeled SPF 30 may act more like an SPF 10. For another person, the same product may act like an SPF 60, he says.
Q: Do the new SPF 100 sunscreens offer twice as much protection as SPF 50?
A: Not necessarily. The SPF testing system may not accurately measure anything above SPF 50, according to the Food and Drug Administration. In 2007, the FDA proposed limiting the maximum l abeled SPF value to 50. Sunscreens with additional protection could be labeled "SPF 50+," according to the proposed rule, which is still being developed.The SkinCancer Foundation, which promotes sun protection, says that in most cases, "SPFs beyond 50 are unnecessary."
Q: So how much SPF do you really need?
A: The American Academy of Dermatology recommends both adults and children use a sunscreen with an SPF of at least 30. Babies under 6 months shouldn't get any direct sunlight, according to the American Academy of Pediatrics.It may be even more important to use enough sunscreen, Lim says. He notes that most people get much less sunburn protection than they might think simply because they don't use enough of the product.The average person needs about 1 ounce of sunscreen — enough to fill a shot glass — to cover the body. Most people use only one-quarter to one-half that amount, Lim says.
Q: Is there any advantage to wearing clothing labeled UPF 50?
A: Yes, Lim says. Sunscreens can rub off or wash away over time. But clothing labeled UPF 50, or ultraviolet protection factor 50, offers long-lasting protection against UVA and UVB rays.
Q: What about UPF 50 umbrellas?
A: You still need sunscreen or protective clothing under these umbrellas, Lim says. That's because the umbrella protects people only from direct sunlight, not the ultraviolet rays reflected up from the sand or pavement.
Q: What kind of ingredients should you look for?
A: In addition to buying sunscreen with "broad spectrum" protection against both UVA and UVB rays, the Skin Cancer Foundation recommends choosing a sunscreen with "some combination" of these ingredients, which block UVA rays: avobenzone (also known as Parsol 1789), ecamsule (also known as Mexoryl), titanium dioxide and zinc oxide.
Q: Are chemicals in sunscreens safe?
A: Although scientists disagree, most doctors say there's no clear evidence that sunscreen ingredients are harmful.
A report in May from the Environmental Working Group, an advocacy organization that studies chemicals in consumer products, raised concerns about two ingredients: retinyl palmitate, a form of vitamin A that has been linked to skin cancer in laboratory rats, and oxybenzone, an estrogen-like chemical that, in animal studies, can cause allergies and alter the body's hormone system.
The Skin Cancer Foundation says none of these chemicals has been shown to cause harm in people.
Though Lim says he's "keeping an open mind" about the environmental group's concerns, he notes that dermatologists have used retinyl palmitate to treat acne and wrinkles for many years. "There haven't been any concerns about cancer," Lim says. "It's always a significant jump to draw conclusions from animals about humans."
Monday, August 23, 2010
Guest Post: 10 Things You Need To Know About Baby Sign Language

10 Things You Need To Know About Baby Sign Language
by Misty Weaver
Chief Editor, Baby Sign Language
Baby sign language is fun, it’s free – and it works! Read on for the top ten things you absolutely must know about baby sign language...
1. Signing To Your Baby Helps With Bonding
Baby signing is a two-way activity, encouraging communication from baby to parent and back again. Mothers who sign with their babies often feel closer to them, noticing and appreciating their efforts at communication earlier than non-signing moms. Many early-years programs teach Baby Sign Language to moms and babies to help build communication and trust.
2. You Can Start To Sign From Birth
The sooner you start signing to your baby, the sooner he will begin to communicate his needs back to you. You can start at any time, even from birth. Start signing with your baby by learning a handful of signs, such as Mommy, Daddy, Milk and Diaper. Find more useful starter signs here.
3. Children Who Learn To Sign As Babies Often Learn To Speak Earlier
Baby signing can act as a ‘stepping stone’ to full speech, supporting a young child’s efforts to express themselves. Research has shown that babies who have early exposure to signing often have bigger speaking vocabularies later on.
4. Baby Sign Language Is A Simplified Version Of ASL
American Sign Language is one of the most widely used sign languages in the world – and baby signing is a great first step to learning what is, effectively, another language. Children who can sign are more sensitive communicators when they meet non-talking or non-hearing children.
5. Baby Signing Is For The Whole Family
Often dads and grandparents feel left out when bringing up a young baby, especially if Mom is breastfeeding. Signing is something baby and daddy, or baby and grandparents, can do together, creating a special bond. All the family can get involved – the more people signing to baby the quicker she will learn.
6. Baby Signing Is Fun!
So many things these days are just plain hard work! Baby signing is fun – and that’s one of the reasons it works so well. At first your baby will just look at you making signs and may even smile or laugh. You may feel silly too. This is good for you and for baby. Parenthood should have as many light moments as possible.
7. Flash Cards Are A Great Learning Aid
Baby Sign Language Flash Cards are a valuable teaching aid to help you develop the signing vocabulary of your baby. Flash cards work because they are a visual stimulus for you and baby, and create extra interest in the idea or object you are signing.
8. Signing Reduces Tantrums
A great reason for learning Baby Sign Language – baby signing has been proved to reduce frustration (for babies and for parents), and help children through those toddler-tantrum years. Most tantrums are caused by communication frustration, and if your child can express what he wants he is happier and calmer – and so are you!
9. Your Friends Will Be Envious
When you and baby are out for coffee, imagine how envious your friends will be when baby tells you she’s tired, or hungry, or too hot – just by making hand gestures? Amazing! While other moms struggle through the baby years, you and your baby will be communicating happily with each other. Be sure to share your knowledge with them!
10. Signing Is Great For Twins
When you have twins, or multiple babies, signing is a great way to give attention and encourage communication. Because you have a ready-made ‘group’, it is also much easier for them to learn the signs.
Check Out Baby Sign Language & Misty Weaver:
This post was a guest post written by Misty Weaver, Chief Editor from Baby Sign Language. I was in no way compensated for this post. Thank you.
Sunday, August 22, 2010
Tips for Helping Children Transition Into Preschool

The new School Year is upon us. This year my 4 year old will be going into Pre-K for more hours and this year I have to pack a lunch for him. I am so excited:) But entering preschool is a big step for any child. Parents and teachers can help children adjust by anticipating their needs and preparing them for their new school environment. Ideally transition efforts, such as visiting the preschool, should start several months prior to the child’s third birthday and/or the beginning of school. The goal is to familiarize the child with the teacher, classroom, and school; provide the teacher opportunities to “get to know” the child and plan more effectively before he/she becomes a member of the class; and provide parents with opportunities to become acquainted with the new teacher, class and school policies and procedures, and future classmates, and their parents.
Specific suggestions for successful transition planning for children entering preschool are:
· Set up an initial meeting with the teacher. Although this can take place at school, home visits give the child the chance to meet the new teacher in their own environment, which can reduce anxiety later and strengthen the sense of home-school connection, and allow the teacher the opportunity to get a firsthand sense of the child’s home environment.
· Plan a few visits to the new school that include spending time with the teacher, exploring the classroom, and playing on the playground. Decide ahead on an individual basis whether visits occur when other children are present.
· Parents should share any concerns or special considerations regarding their child, such certain fears, level of toilet training, food allergies, etc.
· Use pictures and/or stories to familiarize the child with their new classmates and teacher.
· Be sure the child is in good physical and mental health. Schedule doctor and dental checkups early. Discuss with the pediatrician any concerns you have over your child’s emotional or psychological development. The doctor can help determine if concerns are normal, age appropriate issues or require further assessment. Children benefit if potential issues are identified and addressed early. (See “Tips Regarding Young Children With Special Needs below)
· If the child has been in a different program already, encourage communication between receiving and sending teachers, particularly if the child has special needs or particular issues coping in the classroom.
· Allow the child to bring a favorite toy or belonging to school in order to increase his or her comfort level during the first few weeks of school. If your school allows it. Check first, ours does not allow outside things into school unless it is show and tell.
· Don’t over-react if the first few days are a little rough. Young children in particular may experience separation anxiety or shyness initially but teachers should be trained to help them adjust. If a child cries at drop off, parents should remain calm and positive. They should not linger but rather reassure the child that he will be okay and that they will be back soon.
· During the first few weeks of school teachers and parents should share information about how they think the child is adjusting to school.
· Ideally, parents should plan to spend extra quiet one-on-one time with their child during the first weeks. Keep the family schedule as simple as possible to allow for the new preschooler’s adjustment needs.
· Arrange play dates with a new friend (or friends) from school. Strengthening social bonds with classmates helps build children’s sense of familiarity and comfort level in school.
· If possible, parents should try to volunteer in the classroom at least periodically throughout the year. Doing so helps even children feel that their school and family life are linked. Being in the classroom is also a good way to develop a relationship with the child’s teacher and classmates, and to get firsthand exposure to their classroom environment and routine. Most preschool teachers welcome even occasional parent help.
“Adapted from Tips for Helping Children Transition Into Preschool” from the National Association of School Psychologists., 2006.”
The Wiggles Wiggly Circus Live! Review...

On Thursday I took my 4 year old and 18 month old to see The Wiggles Wiggly Circus Live at Nassau Coliseum in Uniondale. We brought along my Mom and my Sister and her 23 month old also. I am a huge fan of the Wiggles so I was really looking forward to this show. My kids are fans too of course:)
Before going to the show I made sure to research what goes on at a Wiggles Concert. At a previous show we went to with Laurie Berkner, all the kids seemed to know to bring Birthday Hats and stuffed animals to put on their heads so I did not want us to get left out this time. I went onto a Wiggles Forum and found out a few things that are done at this concert.
1. Bring Silk Roses for Dorothy. (not real ones! they were all taken away by security)
2. Make a big sign with the kids names on it. (they go around at one point of the show reading all the signs)
3. Make bones for Wags the dog. A lot of people handmade either signs for Wags or stuffed bones for him and they came around and collected them.
4. Bring a camera! You are allowed to take pictures at the show! YAY Pictures!! :)
We found our seats and were thrilled to see we were in the "Hot Potato" seats. These seats have a Wiggles Activity Sheet and a cardboard Guitar on them. Any seat would have been a good seat though. They used half of the Coliseum so it wasn't too overwhelming for the kids.
This show was action packed. They did all sorts of circus performances. A lot of acrobatics. These awesome feats were even done by The Wiggles themselves. Impressive! It really kept you entertained the entire show.
I love how interactive they are with the kids in the audience. They read every sign, took every rose, and every bone from the kids. They even went all the way up into the top row of the Coliseum just so they could read a sign or grab a rose. My son was thrilled when the one to get his rose for Dorothy was Captain Feathersword. He is my son's favorite as you will see in the pictures below.
They sounded great, kept you moving, and really put on a fantastic show. The only downside was that they only played 2 shows in our area. I wish they played 1 more day here on Long Island because I know so many other people that would have loved to go after they heard about it but there is always next time.
Definitely go check them out when they come into your town! Great Family Show!!


**I was given a 4 pack of tickets to the Wiggles Wiggly Circus from usfamilyguide.com to give my honest review**
Friday, August 20, 2010
Five Freaky, Family, Funny, or Fabulous Photo Friday...
Freaky, Family, Funny, or Fabulous, these photos will sure be one or all of that.
Every Friday I am going to share five random pictures that I have taken in the past years. Some with my Nikon SLR, my iPhone, or my Kodak. All different quality cameras but the subject is what means the most to me.
Every Friday I am going to share five random pictures that I have taken in the past years. Some with my Nikon SLR, my iPhone, or my Kodak. All different quality cameras but the subject is what means the most to me.
This installment of FFFF Photo Friday is all about the Staten Island Yankees bs. Brooklyn Cyclones. We went to their game last night and it was so much fun! I highly rec it if you are in the area:)
Thank you for stopping by and I hope you enjoy looking at them as much as I have had taking them:)
Thank you for stopping by and I hope you enjoy looking at them as much as I have had taking them:)


Wednesday, August 18, 2010
Crispy Baked Chicken Strips Recipe...
I just had to share this recipe recommended by Registered Dietitian and former editor at Cooking Light and Weight Watchers Magazines, Regan Jones--she is also a spokesperson for Cabot Creamery Cooperative. Sounds delicious, quick and easy!!
Crispy Baked Chicken Strips

Makes 6 servings
Nonstick cooking spray
1 cup King Arthur Unbleached All-Purpose Flour
Pinch salt
Pinch ground black pepper
4 large egg whites
1/2 cup reduced-fat (2%) milk
1 1/2 cups crushed cornflakes
4 ounces Cabot 50 % Reduced Fat Cheddar, grated (about 1 cup)
6 boneless chicken breast halves, cut into 1/2-inch-wide strips
1. Preheat oven to 375 degrees. Coat 9-by-13-inch baking dish with cooking spray.
2. In three separate bowls:
- mix together flour, salt and pepper
- beat together egg whites and milk
- mix together cornflakes and cheese
3. Dip chicken strips first into flour, then into egg white mixture, then into cornflake mixture, turning to coat. Place in baking dish. (Discard any unused mixture.)
4. Bake for 25 minutes or until nicely browned, turning over after about 12 minutes. Serve with ketchup or barbecue sauce if desired.
Tuesday, August 17, 2010
"Five Lessons Every Kid Should Learn."
There are many Lessons children should learn in their life. I have 2 small children. A 4 year old and an 18 month old. Here are Five that I think are important to my husband and I to teach our children.
1. Treat others the way you would want to be treated!
2. Give back to your community. They have done so much to mold our children, give back.
3. Set Goals for yourself. Example: This year I am going to try hard to learn my letters.
4. Learn that money doesn't grow on trees! Teach your children about money management. Give them chores to do and reward them with an allowance. Then they can go get the toys they want.
5. Share!! Sharing is very important.
Freezing Foods: A Real Time-Saver
As the school year starts rolling around and for some has even started, I am starting to plan my meals for the weeks. I never froze meals before but now that my kids are getting older, I think this idea will work a lot better for our family.
While looking up some recipes I came across this article which gives you the in's and out's of freezing meals.
I thought I would share because it has been very helpful for me so far:)
Now before I start making these meals for the freezer, I must clean it out. Ugh... How I dread cleaning out anything let alone the freezer. It kills me to have to through out anything but sometimes I forget about the awesome steak I bought and how it got pushed to the back of the fridge and got freezer burn:(
On to the tips. Here they are from AllRecipes.com. Tomorrow I will be sharing some of my favorite recipes I found that are good to freeze. If you have any good recipes, please feel free to share with me! I love trying out new recipes:)
Making meals in advance can be as simple as doubling a casserole recipe or tossing an extra meatloaf into the oven.
 |
Before You Freeze
Before freezing hot food, it's important to let it cool down. Heat will raise the temperature of the freezer; and the food will not freeze uniformly, the outer edges of the hot dish will freeze hard quickly while the inside might not cool in time to prevent spoilage.
There are just a few things to keep in mind:
- Cool precooked dishes as quickly as possible before they are placed in the freezer.
- For fastest cooling, place the pan of hot food in a sink filled with ice water (or in a larger pan of ice water). If you're cooling a soup, stew, or sauce, stir occasionally to help it cool evenly.
- Once the dish is cooled, portion it into meal-sized containers or packages. Label and date the containers. Place them in a single layer in the coldest area of your freezer until completely frozen. Rearrange as necessary.
Tips for Freezing Foods
Poorly wrapped foods run the risk of developing freezer burn and unpleasant odors from other foods in the freezer. Follow these simple wrapping and container tips to ensure the quality and safety of your food:
- Use only specialty freezer wrappings: they should be both moisture-proof and vapor-proof.
- Leave as little air as possible in the packages and containers. When freezing liquids in containers, allow a small amount of head room for expansion. When using freezer bags, be sure to remove as much air as possible before closing.
- Wrap solids foods like meats and baked goods tightly in foil before you bag them.
- Use rigid containers with an air-tight lid and keep the sealing edge free from moisture or food to ensure proper closure.
- Secure wrapped packages and containers with freezer tape, and write the dish and the date on the tape with a marker.
- In many cases, meats and fish wrapped by the grocer or butcher need no extra attention before freezing. However, meat wrapped on Styrofoam trays with plastic wrap will not hold up well to freezing. If the food you want to freeze was not specially wrapped, then re-wrap them at home.
- Freeze in small containers with no more than a 1-quart capacity to ensure that freezing takes place in a timely manner (i.e., within four hours). Food that is two inches thick will take about two hours to freeze completely.
Thawing Frozen Foods
With the exception of muffins, breads, and other baked goods, do not thaw foods at room temperature. Bacteria can grow in the thawed portion of prepared foods, releasing toxins that are unsafe to eat even after cooking.
To ensure that your food is safe to eat, follow one of these proper ways to thaw:
In the refrigerator: This is the slowest but safest thawing technique. Small frozen items might thaw in a few hours, while larger items will take significantly longer--overnight and then some.
In cold water: Place the frozen food in a leak-proof bag and place in a large container of cold water.
In a microwave on the defrost setting: Plan to cook the food immediately after it has thawed in a microwave, because some areas of the food might have begun cooking during the defrost cycle.
Best if Used By:
Although freezing keeps food safe for an indefinite amount of time, eventually the flavor will be affected. If the food is obviously damaged (shriveled, with white or frosty spots) it should be discarded.
This chart lists recommended storage times for popular precooked foods--casseroles, soups, lasagna--to ensure high-quality results:
| Type of Food | |
| Tomato/vegetable sauces | 6 months |
| Meatloaf (any type of meat) | 6 months |
| Soups and stews | 2-3 months |
| Poultry and Meat Casseroles | 6 months |
| Poultry (cooked, no gravy) | 3 months |
| Poultry (with gravy/sauce) | 5-6 months |
| Meatballs in sauce | 6 months |
| Pizza dough (raw, homemade) | 3-4 weeks |
| Muffins/quick breads (baked) | 2-3 months |
Don't Crowd the Freezer
A temperature of 0 degrees F (-18 degrees C) is best for maintaining food quality. Proper air circulation is key to keeping your freezer operating at maximum efficiency.
Freezing does not kill bacteria, yeast and molds that might be in your foods--it merely holds them at bay by keeping them inactive. If the freezer's temperature is disturbed often or altered for an extended period of time (such as a door left ajar or power outages) these microbes can compromise your food's safety.
Subscribe to:
Posts (Atom)